MIA’ing and DIY’ing


Im back!

And we got alot of catching up to do.


first of all, we finally bought our very first home! And that is where all my time has been spent.

instead of spending my weekends partying and living the dream, I now garden and spend all my free time DIY’ing. When all our projects are done and we finally jump into bed, i lie awake on my Pinetrest  looking for new ideas and new projects. It really never ends.


But now that it has calmed down a bit, I am able to share with you some of my favourite DIY and home trends i have found.

Take a look at my HOME Pinterest board and get inspired.

Here are some of my new favourite pins from my HOME board, that we WILL be doing now that it is summer again.


We spend most weekends and evening out on the Veranda which is above ground level. I hate this because it means our neighbours can basically turn their heads and look right at us, we have been  playing around with different ideas that we can do/use as a privacy screen, but i think my mind is set now on the chevron shape (Left) which is easily made out of pallet wood or pine wood. Cheap, Easy and so beautiful.

We did not have a veranda to start with so we built our own, we stained it with a dark stain (not varnish, who really wants to be sanding it down and repainting it in a few years time, iIwould rather just add another layer of stain. I hate sanding)

I am now waiting patiently for my vines to start creeping up the wooden poles (If you know me, you will know I am not the most patient person, so this is extremely hard for me) I just love the contrast of the very dark black and the green with touches of whites and creams (Right). I think it makes such a statement.

All these and more ideas on my Pinterest 


Now here are few pictures of my work, Let me know what you think 🙂


Our floating shelves (Left) in the lounge, we made these by using scaffolding wood, which are these extremely long thick pieces of wood (+-R300 per length) they were cut to size and stained. Wesley then drilled holes into the back on them (3 holes per shelf, 1 on each end and 1 in the middle) he then put stainless rods about 30 cm long, 15 cm of this was put into the drilled holes and secured with “no more nails” glue and hammered int here real good (They not going anywhere) he then drilled holes directly into the wall filled with “no more nails” and shoved the “floating sleves” in, we hammered them in to make sure they were snug. they are so solid we could probably climb onto them.


The pictures just dont do them justice, they are so thick and rustic and have such a solid look about them. nothing like the thin flimsy ones you would buy from a store.


Middle Top: (My spare room head board) these were made with left over pallet wood we were about to throw away, was such an easy project, you dont even need a man to help.


Middle Bottom (My Best Friends birthday present) All she wanted was her room to be redone, so Wesley and I got 2 large pallet for the base and stained them dark mahogany (the length is longer then mattress so there is the perfect seating area for when you putting shoes on 🙂

we then made the pallet headboard to match, all so. the whole project took us an after noon.

we then quickly threw these 3 arrows (Right) together as another gift for a friend which hang as wall art. So simple but makes such a statement.


If you would like to see more our my DIY projects, let me know, send me some inspiration I love to hear you thoughts.


XOXOXO

LB

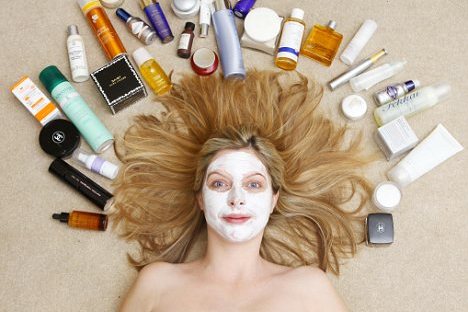
My Beauty Bag

I was going to write about my beauty routine – but that never stays the same, I have accumulated and collected so many products and brands that it is kind of like a lucky packet – so instead of writing about the routine, I will tell you what products I have and what I think about them:

Face wash:

Clarins Daily energising Cleansing Gel – I still find this to be the best, it does not dry my skin out to much, it also isn’t too badly priced +- R125.00

Woolworths Daily Cream Cleanser – This is another one of my favourites, My skin is left smooth and hydrated. Not only do they not test on animals this Cleanser retails for about R100.00

Clarins one step Gentle Exfoliating Cleanser – You know when you buy a new exfoliator and you cant wait to use it, only to find that the exfoliating beads are big and rough and you know immediately that it is not good for your face. This is not one of them, these beads are perfectly smooth and just the right size, my skin glows after using this and you really only need a small amount.

Toner:

Clarins One Step Facial Cleanser – Its ok, smells good. I have never been a fan of toners, i find them quite pointless (I know they are important for some reason, but i always tend to skip this part)

Instead of using a toner I use the Clicks 3 in 1 facial wipes (These re also fantastic for those late nights when washing your face is just a NO) I use these every night to remove excess makeup and eye makeup.

I ran out of these about 2 weeks ago and haven’t had a chance to get more, in these 2 weeks I have noticed a big change in my skin, I have had a few breakouts and my skin just isn’t looking so good. It is not like I have stopped my routine at all, i still wash my face I use my toner etc.

Moisturiser:

Clarins Daily Energising Cream – I have been using this for about 2 years now, I love it. I use this in the morning and also sometimes at night. it is extremely light and absorbs quick enough to put makeup on straight after.

Clarins Hydraquench Cream – This is my absolute favourite – unfortunately I only get this in sample size when I purchase my products on a Clarins special and get to choose 5 products – I always try and make all 5 this – it is that good 🙂

Face Oil:

This is a new product i have started to use, I was hesitant at first. I thought this would make my skin oily and clog my pores.

Boy was i wrong, this has been my lifesaver this winter, i am trying to make it last as long as possible and also dont enjoy the feel of only applying the oil – I miss the oil with some of my chosen face cream then apply.

It does not absorb instantly so put it on 10- 15 minutes before you go to bed.

Eye Cream:

Currently I am using the Clarins Contour Gel – To be honest i dont use this every night. but out of all the eye creams I have used in the past – this is the best. it absorbs quickly and is so light on the skin.

My Other favourite eye cream has got to be the ROC Sensitive Eye Cream, this is a bot more on the pricier side and is not really an eye cream for my age group, but whenever i used it i looked so awake the next day, I looked different, it was magical. I have stopped using this because its not for my age group but will definaltey use this again when I am a bot older and need that extra help 🙂

What are your favourite products? I love to hear your feedback.

XXX

LB

What is a serum – and how do I use it?

What Is A Serum?

While regular moisturizers contain only between 5 and 10% active ingredients, serums are far more concentrated and contain an incredible 70% active ingredients. This means that your skin gets a real boost of nutrients that will truly make a difference and work on your specific skin concern. Serums are thinner and more fluid than moisturizers and are all water-soluble, meaning they contain no oil.

How Do Serums Work?

Serums have smaller molecules than moisturizers allowing them to penetrate deeper delivering added nutrients to the deeper layers of your skin.

What Are The Skin Benefits Of Serums?

Serums improve your skin cells and all deliver a beautiful healthy glow with regular use. Because Serums are so highly concentrated they deliver a potent boost of nutrients that will work on your specific skin problem. The three most common serums are ones that target acne, fine lines and wrinkles and ones that brighten the skin.

How To Choose A Serum?

Look for ones that contain natural, organic ingredients so that you know you are providing your skin with antioxidants and not chemicals.

How To Use A Serum?

Don’t ditch your moisturizer after purchasing a serum! A serum is applied after cleansing and toning your skin and before you apply your moisturiser. Once your face is clean simply pour about 4-5 drops into the palm of your hand and use your fingertips to gently pat the product into your skin. Don’t rub, but rather pat it in as this allows it to absorb better and more evenly. Wait 5 to 10 minutes before applying your moisturiser to really allow the serum to penetrate and work its magic.

A great tip is to keep your moisturizer in the fridge and then when you apply it over your serum it will push the blood away from your skin and create a vacuum effect, which will pull the powerful ingredients deep into your skin.

If you have never tried a serum before, then you should definitely invest in one, there is never a wrong age to start! Serums are more pricey than regular moisturisers, as they do have a far more potent concentration of nutrients and antioxidants, but the fantastic benefits will truly show. Once you start to see the improvement and brightness in your skin, you will be hooked. Even though serums are a bit more expensive, only a small amount is needed at a time so it can last you for quite a while! unlike moisturiser, Serums are mainly used at night, helping your Serum to last a bit longer.

My Top Serums:

Obviously Clarins would make the top:

Clarins Double Serum

Clarins Hydra Quench Bi Serum – The Hydra quench raange is great for dehydrated skin.

Vichy Liftactiv Youth Serum 10

The Body Shop – Nutriganics Smoothing Serum

There are so many brands out there to choose from – these are just the brands I have used.

Please let me know if you have tried any out there that you find fantastic, would love to try out some new brands 🙂

XXX

LB

In case you don’t hear from me. I will be in the bath – my LUSH Haul

Its no secret that I am a massive Lush fan. Perhaps their number. 1!

11707480_10153502756141789_7938727361977646973_n

I recently got a new Lush package. got a refill of my favourites and decided to try some new.

I have posted video links – from other blogs – so you can see exactly what the products look like and what they do. I always like to look before I but, they are a little more in the pricey range, so definatley look what they do and listen to what others say before you buy one and it is not what you expected.

My Favourite, Think Pink:

This is my absolute favourite, its the reason I am obsessed with Lush and the reason i always need to go back.

It turns your bath water to a baby pink, if thats not enough, little paper hearts will fill your bath, like magical unicorns throwing their love at you.

It is like a bath celebration – with heart confetti and bubbles.

And the fragrance. Gosh. Get me back in the bath. RIGHT NOW!

Some new:

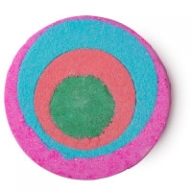
Granny takes a dip.

I havnt tried this one yet, but I could not be more excited.

I watched a Youtube video on it. It makes a big Rainbow in your bath.

have a look: Granny takes a dip

Twilight:

I havnt tried this either yet – trying to save them, as I dont have a Lush store in my town and need to wait for someone to go to Cape Town to get for me.

It is supposed to change the colour of your water and also has a bubble bath agent in it, so bubbles 🙂

It is supposed to leave your skin moisturised.

But here is a video I watched before purchasing. Twilight

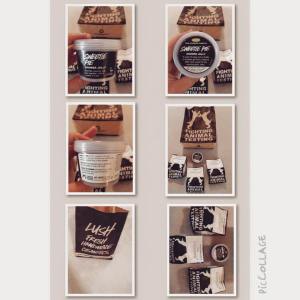
Sweetie Pie: Bath Jelly.

This is my first time I have used a bath Jelly, and I was so excited. I smells devine, like i needed to eat something sweet after.

I did find it hard to get a piece of the Jelly off. but it was totally worth it.

I didnt quite know how to use it, but apparently you break a piece off and rub it in your hand with your loofah. It seemed to work and a little bit of Jelly did my whole body.

This is definately one you need to try.

Lush Sweetie Pie Bath Jelly – video link

LINKS to purchase:

Sweetie Pie Bath Jelly

Granny Takes a Dip

Think Pink

Twilight

3052-500x500   Granny takes a dip web-500x5003157-500x500

Do you have any suggestions on what I should get.try with my next Lush purchase?

XXX

LB

Beautiful Blogger Award

I’m so happy to have received another award. I’d like to thank Alice’s Wonderland for nominating my blog for The Beautiful Bloggers Award. I really enjoy and appreciate receiving awards. Since starting this blog, I have been truly blessed with a wonderful community of bloggers and have been introduced to so many new blogs out there.

The Rules
Link to the blogger who took the time to nominate you. List seven random things about yourself. Nominate seven creative, beautiful bloggers. Notify the Blogger that you nominated their blog for the award.

You can find seven random things about me on a previous post for The Creative Blogger Award. (And one extra random fact, I am extremely Lazy, Therefore I am not thinking of extra facts about myself, I did it once, and not that enough effort)

b6b9128c36c6569101d9fab97729cc94

MY NOMINEES

Crafts Beauty and More

Sama Talks

Glam Necessities

A Beautiful Whim

Helpless Whilst Drying

Just My Look

Fashion and Style Police

Loves,

XXX

LB